diy | snail mail boards
When Jacqueline told me about what she was planning for yesterday's post on snail mail (which you can read HERE), I got inspired to figure something out for our snail mail: the notes, announcements, coupons and cards I don't want to part with immediately. I can't put magnets on my fridge, so I took an unsightly wall in our mudroom and got creative. This room leads to the garage, powder bathroom, laundry room, coat closet and kitchen/great room. Basically, it's grand central.
Here's the wall BEFORE the makeover.

I used the following items for my little DIY project: two sheets of Elmer's foam board from Walmart, some burlap-type fabric, a hot glue gun, scissors, scraps of grosgrain ribbon, Command velcro strips for picture hanging (also from Walmart) and a level. (1) Cut the fabric so that it is about two inches larger than the size of your foam board on each side. If you're using 18 x 20 inch foam board, you'll need to cut your fabric so that it's 22 inches x 24 inches. (2) Glue the fabric to the foam board, wrapping the edges onto the back.

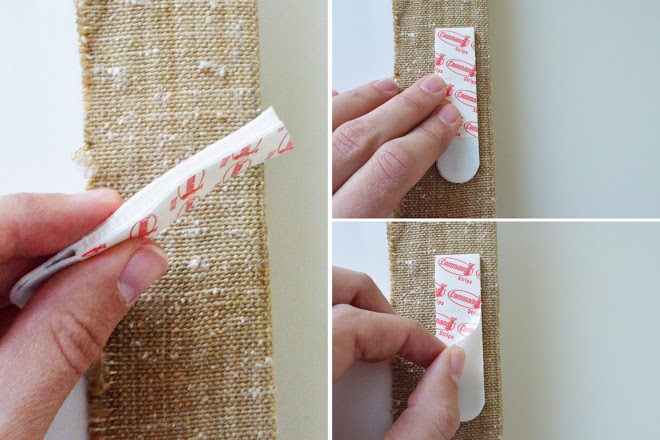
(3) Squeeze two pieces of the velcro together. (4) Remove the adhesive on one size of the velcro and stick it to the edge of your board. Repeat on the other side. You may need a third piece along the bottom edge. (5) Peel off the other piece of adhesive and stick the board to the wall.
Here's the BEFORE again:

And here's the AFTER:
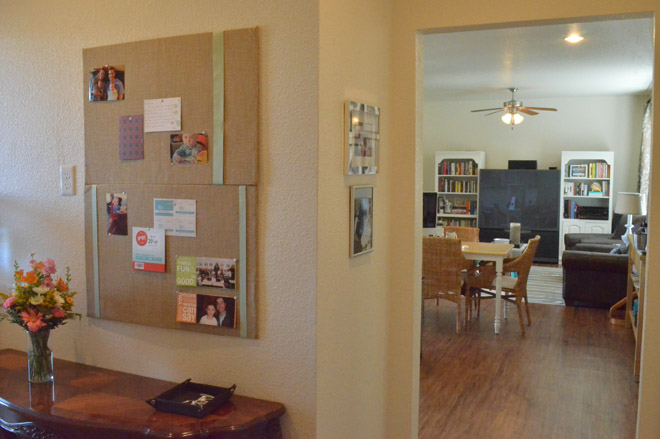
I added grosgrain ribbon as trim and moved the flashlight to another outlet in the room. It's a vast improvement and now we have a place to put all of our beloved snail mail. Loving it.

Here's the wall BEFORE the makeover.